This project almost cost me my sewing mojo. September was in general a bad month and I’m still recovering from it. One of my problems is that I always have big plans, and as I’ve seen in past months that I could make four projects in a month, I wanted to make four blouses this September and present one of them to the Fall for Cotton. The blue puppies fabric was burning a hole in my stash and I needed to make something for it. As I thought it was going to be something fast I decided to dedicate the first week of the month to it. That first week I also worked and finish my Calimero. And then Koen left for Paris, work started to come in tons and everything went to hell. I blame for it the pattern but also the amount of work I’m having lately, leaving me exhausted to be able to accomplish anything afterwards. And yeah, also being home alone leads to watching too many episodes of Doctor Who for my own good.
I wanted to make a couple of 1950s blouses and I had two beautiful fabrics for it. One of them was 100% cotton (bought at Telaria) so I decided to work with that one first to be able to finish in time for the Fall for Cotton. If the result was good, the plan was to make the same pattern again with the other fabric. Because you know, I could make four projects and I was going to have a lot of time to make both blouses and then something else. Ha, I can be so naive…
After browsing for patterns for a while I decided to get this blouse pattern from Embonpoint Vintage.
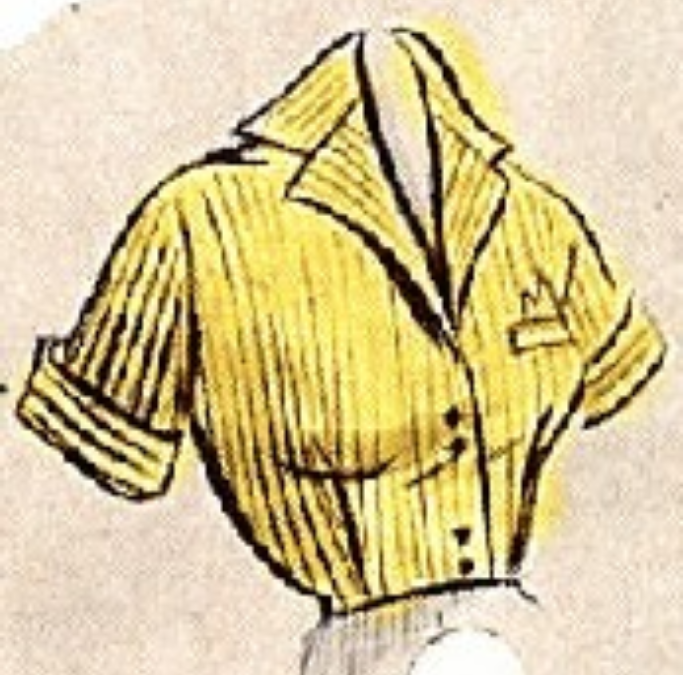
I thought of buying the McCalls 7378 that Zilredoloh made but I couldn’t find it anywhere, and I didn’t find any other pattern that I could get on time, so a PDF pattern was the best option I could have. In my innocence, I thought this pattern I chose was going to be something simple. A drafting method couldn’t be that difficult, since I’ve already drafted some patterns myself. And the description said something like:
This is not just a pattern, it’s a drafting system, so once you own this, you can draft yourself a pattern IN ANY SIZE (from a 20 inch bust to a 69 inch bust). Whether you want this garment for a doll or a plus-sized person you will be able to make this fit perfectly.
The drafting system is so simple a child could do it. There’s no complicated math, it is literally “Join the Dots”.
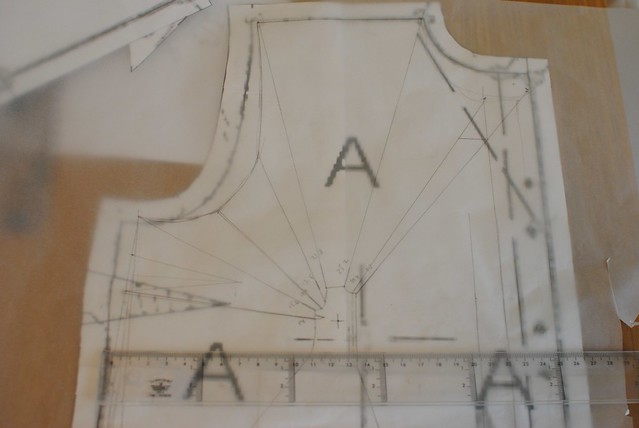
But it ended up being more complicated than I expected. It’s a similar method to the Lutterloh System. You get a ruler and using that, a measuring tape and the patterns in a very small size, you should be able to draft your final pattern on any size. After buying the pattern I wanted to see other finished projects with it, but found none. In fact I only found a couple of finished projects based on other patterns in the Facebook page of Embonpoint. I checked on Pattern Review and nothing, just a thread in the forum but no projects based in any of those patterns. That should have discouraged me, but you know, sometimes I’m so brave that I’m almost stupid. After fiddling for a couple of days with the pattern I couldn’t wrap my head around it so I sent a message to Omega to make sure that I got things right. After a couple of messages I got it all clear and started drafting (the part I hate most from sewing) and a week was gone. We were already in mid September. I tried drafting the pattern several times, but I couldn’t make it work. Basically you get all pattern pieces printed out on a page, so each piece is maximum 2 inches tall. There are some lines extending from those pieces and you just have to prolong them depending on your bust size. The problem is that the initial size is so small that it’s almost impossible not to introduce measuring and angle errors. I drafted the front bodice but the neckline looked weird even after trying several times, the length was a bit too short and the shape was definitely wrong.
After some more days ruminating (and stuck again) I decided to cheat completely on the method using digital tools from the 21st century, opposed to the ones of the 20th. This is what I did:
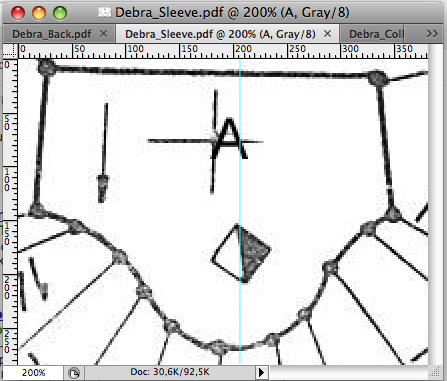
- The pattern and instructions were several pages and I just needed the very page where the pattern was, so I used a PDF printer to have a pdf file of that page.
- I imported that PDF file into Photoshop and place each pattern piece on a separate file. After measuring the pattern on paper and doing some calculations, I increased each file by 1100%. In order to print it in normal A4 paper I drew some lines and inserted the character ‘A’ to help me align the pieces after printing them out.
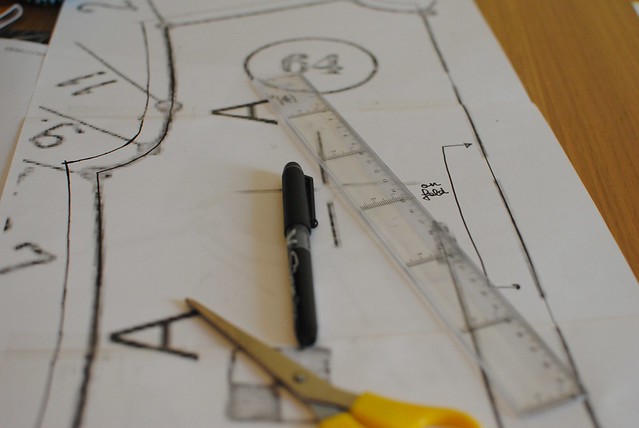
- After printing those out, I put them together. As the lines were a bit thick and fuzzy I re-traced then with a black pen to make them sharp and added seam allowances.

- I measured the pattern pieces again to make sure that they were going to match my body measurements. So far so good. Time to cut them out.
I have to say that this personal method worked for me but may not work for you. I’m also not sure what happens with the proportions when using the “conventional” method but your bust size is larger or smaller than let’s say my size (33″). I guess that in any case you have to be careful about the length and use the slash and spread method when necessary.
After making my first muslin I discovered that the shoulder was 3/4″ wider on the back piece than on the front. Weird, especially taking into account that the back piece was narrower than the front so I don’t think this was distorted. I checked the original image (the tiny one) and the same discrepancy was already there. C’mon, why do you have this kind of things in the original pattern? I changed the front pattern piece to make the shoulder match the back since this suited my shoulders better.

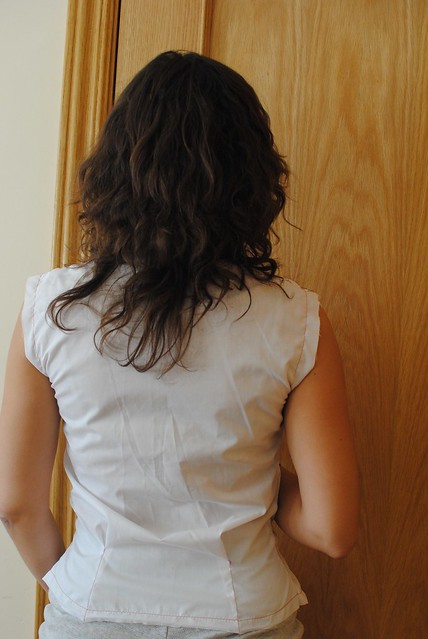
As you can see in this first muslin, the front is fine (it just needed longer tucks) but the back feels too tight, especially if I move my arms, so I needed to make a broad-back adjustment (too much Capoeira). After giving it a bit of thought I also made a sloping shoulders alteration (1/2″).

I ended up adding a couple of centimetres on each side and it turned out fine.
After trying my second muslin to make sure that my previous alterations were right (sorry, I got no pictures of this one), I tried the collar and saw that the collar piece was to large for the neckline. Weird, again. I trimmed a good two inches from each side and re-drafted the collar.
The tucks also needed alteration, since the blouse looked baggy on me (like the portrait blouse) so I lengthened them and made them narrower to be able to breath.
One thing to take into account when using these patterns is that you will find no notches or pattern pieces for the facings. You are on your own for most of the process. Drafting facings is easy, and you can always make a notch to match the middle of the collar with the middle point of the back piece, but for the rest you need to eyeball it, even for setting the sleeves in. Luckily this was not too difficult, since the sleeve cup was less than 2 inches longer than the armscye. For setting the sleeves in this post by Tasha of By Gum By Golly and this Youtube video were very helpful.
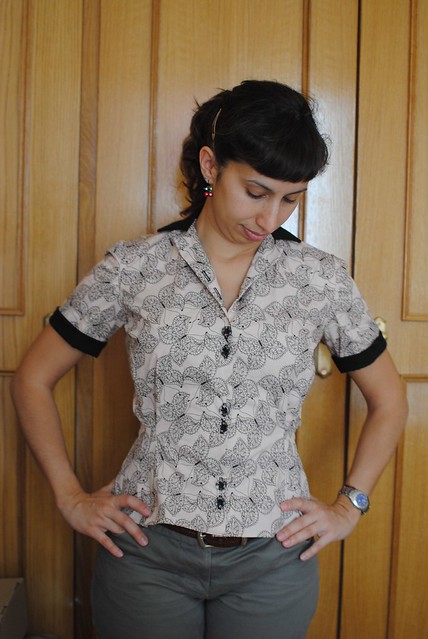
After the pattern was drafted and trued I cut my definite fabric and started constructing the blouse. I used French seams after the big success of the Blue Puppies Blouse (I’m never ever going to use another thing on blouses) and decided to give it another 50s touch by using a contrasting black fabric for the collar and the cuffs. I know that the finished garment looks like a 50s waitress outfit but I don’t mind. I like it like this. I imagined this blouse just with that light pink fabric and it stroked me as dull.
After placing the collar on the definitive blouse I understood that the neckline was too short for my neck. I should have seen that earlier and made the neckline bigger, since the collar looks a bit too short. It could have been that the original collar was just right, but then it didn’t match the original neckline. Weird stuff again. Anyway, I’m never going to wear this blouse completely closed so this mistake is something I can live with.
For the join of the sleeves and cuffs I used flat felled seems. I think it looks much neater than just joining them with a regular seam.
When cutting the collar pieces I trimmed 1/8” of the bottom piece outer edges to make the collar roll properly.

My finished blouse has two extra buttons at the bottom not present in the original design. I guess that if you just wear this with a high waisted skirt it’s just fine, but it just felt wrong being able to see my belly button when trying this blouse without tucking it inside my pants.

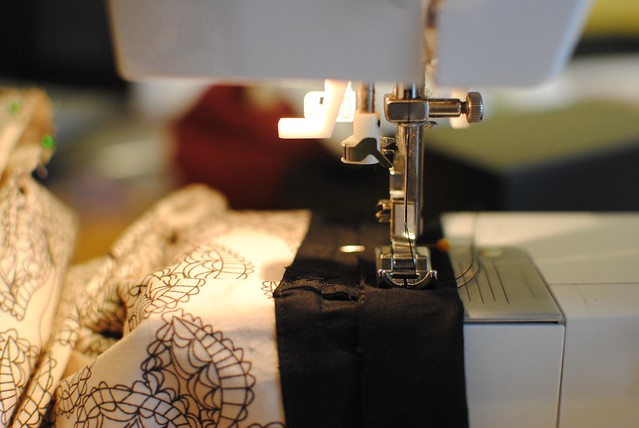
And talking about those buttons, making the buttonholes gave me more than a headache. It seems I didn’t get used to the 1-step buttonholes of my machine and I got them wrong many many times. If anybody could just give me a piece of advice I would really appreciate it.
The back is still a little bit baggy, but I guess you always have a bit of that when using tucks for shaping.

All in all, I like how this blouse came out. I’m not very happy with the collar since it’s a bit too short and I would have liked it to be more “evident” but for a first try and with no guidance from the pattern whatsoever I think it’s not too bad. Now I just wish I had also made a black pencil skirt or circle skirt to go with it. I guess it will be for next Spring, since the temperature here dropped quite a bit this weekend and I think Fall is here to stay.

I feel happy after having this blouse finished for good. The result is decent and I have learned a lot. It was a burden on me for the past three weeks and I’m finally free to go on with my life and work on other projects!
I think I’m just going to celebrate it with the one that was my happy song for a very long time.
Oooh! That blouse is wonderful!! You did a lot of work fitting it from the original muslin but it really paid off. 🙂 I love those double buttons, very 40’s.
Thanks a lot. It was a lot of work indeed and it got me stuck many many times. I can’t count the days when I thought I was not going to be able to finish it. But indeed, all the work paid off… except for the collar, haha. I had different buttons in mind, but once I saw these I needed to have them 🙂
This is probably why I haven’t ventured into sewing. There seems to be so much to consider all at once. Of course, I’m sure there are simple patterns that don’t require drafting that I may try sometime, but this was like more drafting lessons for you! It is beautiful on you, though. My untrained eyes see no flaw in the collar or anywhere. I can see the allure of making your own blouses. Where else would you find a unique and well-made piece like this?
Oh, and I forgot how silly that video was. I remember watching it as a little girl and not knowing what the heck they were talking about! 🙂
That video is great. I had a very bad experience some years ago and little stupid things like this video were the ones that kept my sanity almost intact 😉
If you choose an easy pattern or at least one that has been fully tested you don’t run into so many issues as I did this time. That’s what you have Pattern Review for. I was just too naive and chose a pattern that nobody had made before, nobody had reviewed, so I should have realized about the risks. Now I know for next time.
This was about drafting and fitting, and it was the first time that I need to modify things so much. I didn’t need to fiddle so much when making pants for Koen or myself! At some moments I really felt out of my depth but we have wonderful resources on the internet and I finally made it 😀
I’m quite pleased with the blouse, especially taking into account all I had to modify and do for myself. I can’t help but feeling a bit proud of myself 🙂
I feel your pain over this challenge. As you know my sewing mojo certainly took a hit this past month over my project. But we both persevered and completed them. It may have been a tough sew but your results are wonderful. I love the placement of the buttons, it gives the blouse a unique look and the fabric is perfect. What a great job! The blouse fits so well. Certainly a garment to be proud of! Congratulations!
Thank you so much 🙂 It was painful indeed, but now that the blouse is finished, it’s almost forgotten. The drafting and fitting were the most complicated things that I’ve tried in my life, but it paid off indeed. I’m just a bit annoyed with the collar, but I think I did the best I could with the pattern and the knowledge I have (not a lot yet). I wish it was warmer again to make a black circle skirt to go with it, since it doesn’t go very well with low waisted pants 😉
I’ve also used photoshop to enlarge a pattern, for my Bustier Top! It was so easy and it fit perfectly, it might make some pattern markers cry but if it works, it works 🙂 Love your top and now I’m singing that song in my head 🙂
True! I remember it. This was my first time using photoshop for a pattern. I’m normally not afraid of tracing and I even traced patterns from scratch, but this pattern method just didn’t work for me since things were getting distorted.
Thank you for your kind words and I’m glad you like the song 🙂